Sunday 28 July 2013

spellbinders


Jill has used the Spellbinder Flourish die to make these elegant cards.  She has also used a range of scrap book papers, acetate and Kaiser mini blooms.


Wednesday 24 July 2013

Sweet Centre Card

The Sweet Centre Card Classes are going well we have several variations of the card available to see and Gloria who has already done the class has come up with her own version using photos.  It looks fantastic.

Monday 15 July 2013

These beautiful sample cards were made for me by Amanda in Mogo in NSW she has used some of the recent releases from Kaiser. 


Wednesday 10 July 2013

owls


Shirley made these beautiful cards using Stampin Up dies.
We don't carry the Stampin Up die but we do have a very similar Sizzix die which is just as cute.  
So if you would like to make this card using the Sizzix die we do have some on the shelf.  Stock is limited so hurry in.
 
 
Owl


Tuesday 9 July 2013

XOXO

My very clever friend Pauline has designed these gorgeous cards using the beautiful American Craft paper from the XOXO range.


Why not pop into the shop and have a look as both of them have a 3D effect and look even more amazing in real life!  We have all of 5 American Craft printed papers that were used in these cards available in the shop.

A Little Birthday Wish


Carol made this gorgeous card using this set of stamps from Stamp It. It has a variety of flowers on the set and is great value at only $29.95. We have featured this set a few times before as it is one we love to use.

Woodmount Stamp A5 Self Cling Unmounted Stamp SetLiquid PearlsLiquid Pearls

The flowers were stamped and embossed  in black ink and embossing powder. Staz On ink could also be used as it is a solvent based ink pad. Squeeze out a small amount of Liquid Pearls onto a plate. Dip you brush into water and squeeze out the excess water, Pick up a small amount of the Pearls onto the brush and begin painting the flowers.


Monday 8 July 2013

The silver flowers........


We have a beautiful card in the shop that Jill made using some of the new Spellbinder dies. It is a very simple card and it looks gorgeous. Jill has posted the instructions on her blog on how to make this card using the dies and the embossing mats.  Great post Jill.

The dies used on the card in the shop (Lily of the Valley and Blue Bells) and the embossing mats will be available in the shop when they arrive from the supplier on Monday.


Asters and PoppiesBlue Bells and Lily of the Valley

Silver Die-Cut and Embossed Flowers - Instructions


Many of Crafty Capers' customers have asked how I made the pink, silver and white card on display in the shop near the Spellbinders dies. *Note - my own dies differ from the set used in the shop.

Die-cutting Techniques for Pink and Silver Die-cut Flowers Card 
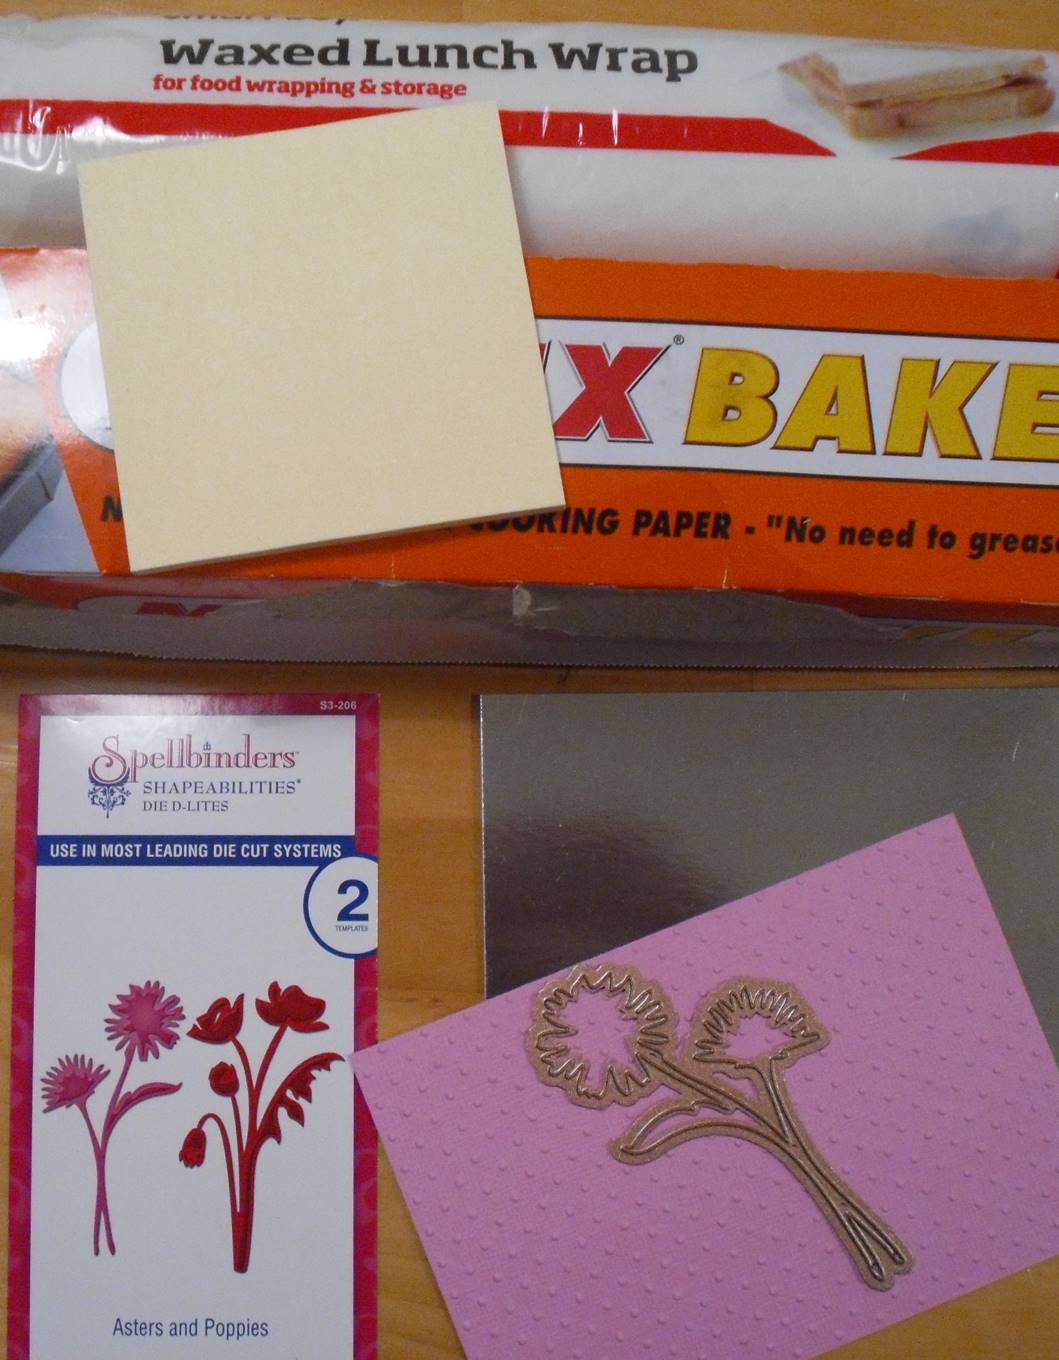
Requirements - In addition to the pink and silver cardstock and Spellbinder dies, you will want
  • Post-it notes
  • Waxed lunch wrap
  • Baking paper

Die-cutting Basics
For dies with narrow or intricate areas, we have found best results using
  1. a layer of waxed lunch wrap against the cutting edge of the Spellbinder die,
  2. a layer of baking paper over the waxed lunch wrap
  3. your cardstock (textured side towards baking paper)
Asses your die-cut from behind after the first run through the BigShot (or Cuttlebug). If necessary move to another area on the plate and re-run through machine. Repeat if reqired. (If you have seen 'Madagascar' think like a lemur - "I like to move it, move it").

Note from Jill  - I use a BigShot die-cutting machine at work and at home.  If you are using a Cuttlebug check manufacturer's instructions for plate combinations and no. of rubber mat/s used for embossing.

Instructions
Use sample die-cut shapes to design your layout.


Use the sticky part of a Post-it Note to anchor the die in place for the first cut on the pink card. I have left the layers of lunch wrap and baking paper inside the die from when I cut my sample shapes and they are kept in place throughout the cutting stages on this card.


Run pink layer with attached die through the die-cutting machine.
Reposition the die, adhere with a Post-it note and run layer through machine again.


Apply double-sided tape to back of pink layer. 
Adhere pink layer to silver layer.

Re-seat the die in the first cut-out area of the pink layer and adhere firmly with a Post-it note.
Place this layer face down on the Multipurpose platform. The smooth surface of the die will be against the platform.


 Lay rubber embossing mats over the back of the silver layer (It looks white on photo).


 Add the three thicknesses of card as a shim, and ONE acrylic plate. Run this through the BigShot to emboss first flower on silver layer.


Reposition the die over the second (unembossed) cut-out area on the pink layer and adhere firmly with a Post-it note.


Place layer face down on Multipurpose platform.The sample shape on photo indicates where the die is underneath this layer.

 Lay the rubber embossing mats ONLY over the area with the metal die under it.
 Add card shim and ONE acrylic plate only over rubber mats, and run through the machine
.Remove die and adhere ribbon across the layer adhering the ends behind the layer.


Complete your card by adding a bow and adhering to a white card base.

Sunday 7 July 2013

Birthday cards

This display has been up in the shop for a few weeks now and has been very popular. 

We used 8 different papers from Doodlebug all based on the birthday theme. Each print came in male and female colours.

There are some fancy folds in there and all but 1 of them (the first one) fit into a standard envelope.

Other items used to decorate this card include Stamp It stamps, Doodlebug stamps, Kaiser flowers, pearls, rhinestones, Staz On ink, Versamark pens and Scalloped Oval dies.

Below are the unmounted rubber stamps that we used from Stamp It. These stamps are available in store now.

Woodmount StampWoodmount StampWoodmount Stamp
Woodmount Stamp


Sorry about the blurry photo, I took and many different photos and just could not get a clear one.


Thursday 4 July 2013

Couture Parisienne

We have a great stamp that we have used in the past.  It is called Couture Parisienne and it is an unmounted rubber stamp.   Jill and Shirley have done some more amazing samples using this gorgeous stamp from Stamp It.  Products used on the card below include ribbon, rhinestones, glitter paper, black and white embossing powder and staz on ink.  All of these products are available in store.


Woodmount Stamp